5 Tips for a Successful Art Market Season
Longer days and warmer temps can only mean one thing for artists: art market season is upon us! It’s an exciting time, full of busy preparations, a little stress, and maybe some anxiety, especially if this is your first time selling art in person. Not to fret, friend. I’ve put together some tips and tricks to help make your art market season a successful one! Art markets are a fantastic way to make some (or a lot) of cash while exposing your brand to the public and, as intimidating as they might feel at first, they’re actually a ton of fun.
Promise.
My first market was back in late 2019 when I was a brand new little business owner in Michigan. I made about $600, my booth setup was pretty meh, and I had absolutely no idea what I was doing. But hey, I sold some art! I learned a lot, and my cheeks hurt by the end of the day from smiling so much. Watching people engage with my art, seeing them react to my paintings and ask me questions about who I am and what I do, well, it’s a feeling that no amount of vanity metrics on Instagram can touch, and it’s the reason selling my art in person is my favorite way to sell.
Since that first market, I’ve grown quite a bit as an artist and business owner. I’ve sold at more markets than I can remember, and I’ve picked up a few strategies that have helped me find serious monetary success at my shows. In fact, my most lucrative market to date brought home more than $3,000 in one day. I don’t write that to boast or impress you, but rather to inspire you and prove that art markets can be a really great stream of revenue for your business.
So, enough chit chat, here’re a few of my best tips and tricks for having a successful art market season, in no particular order:
TIP #1 — Don’t underestimate the impact of height.
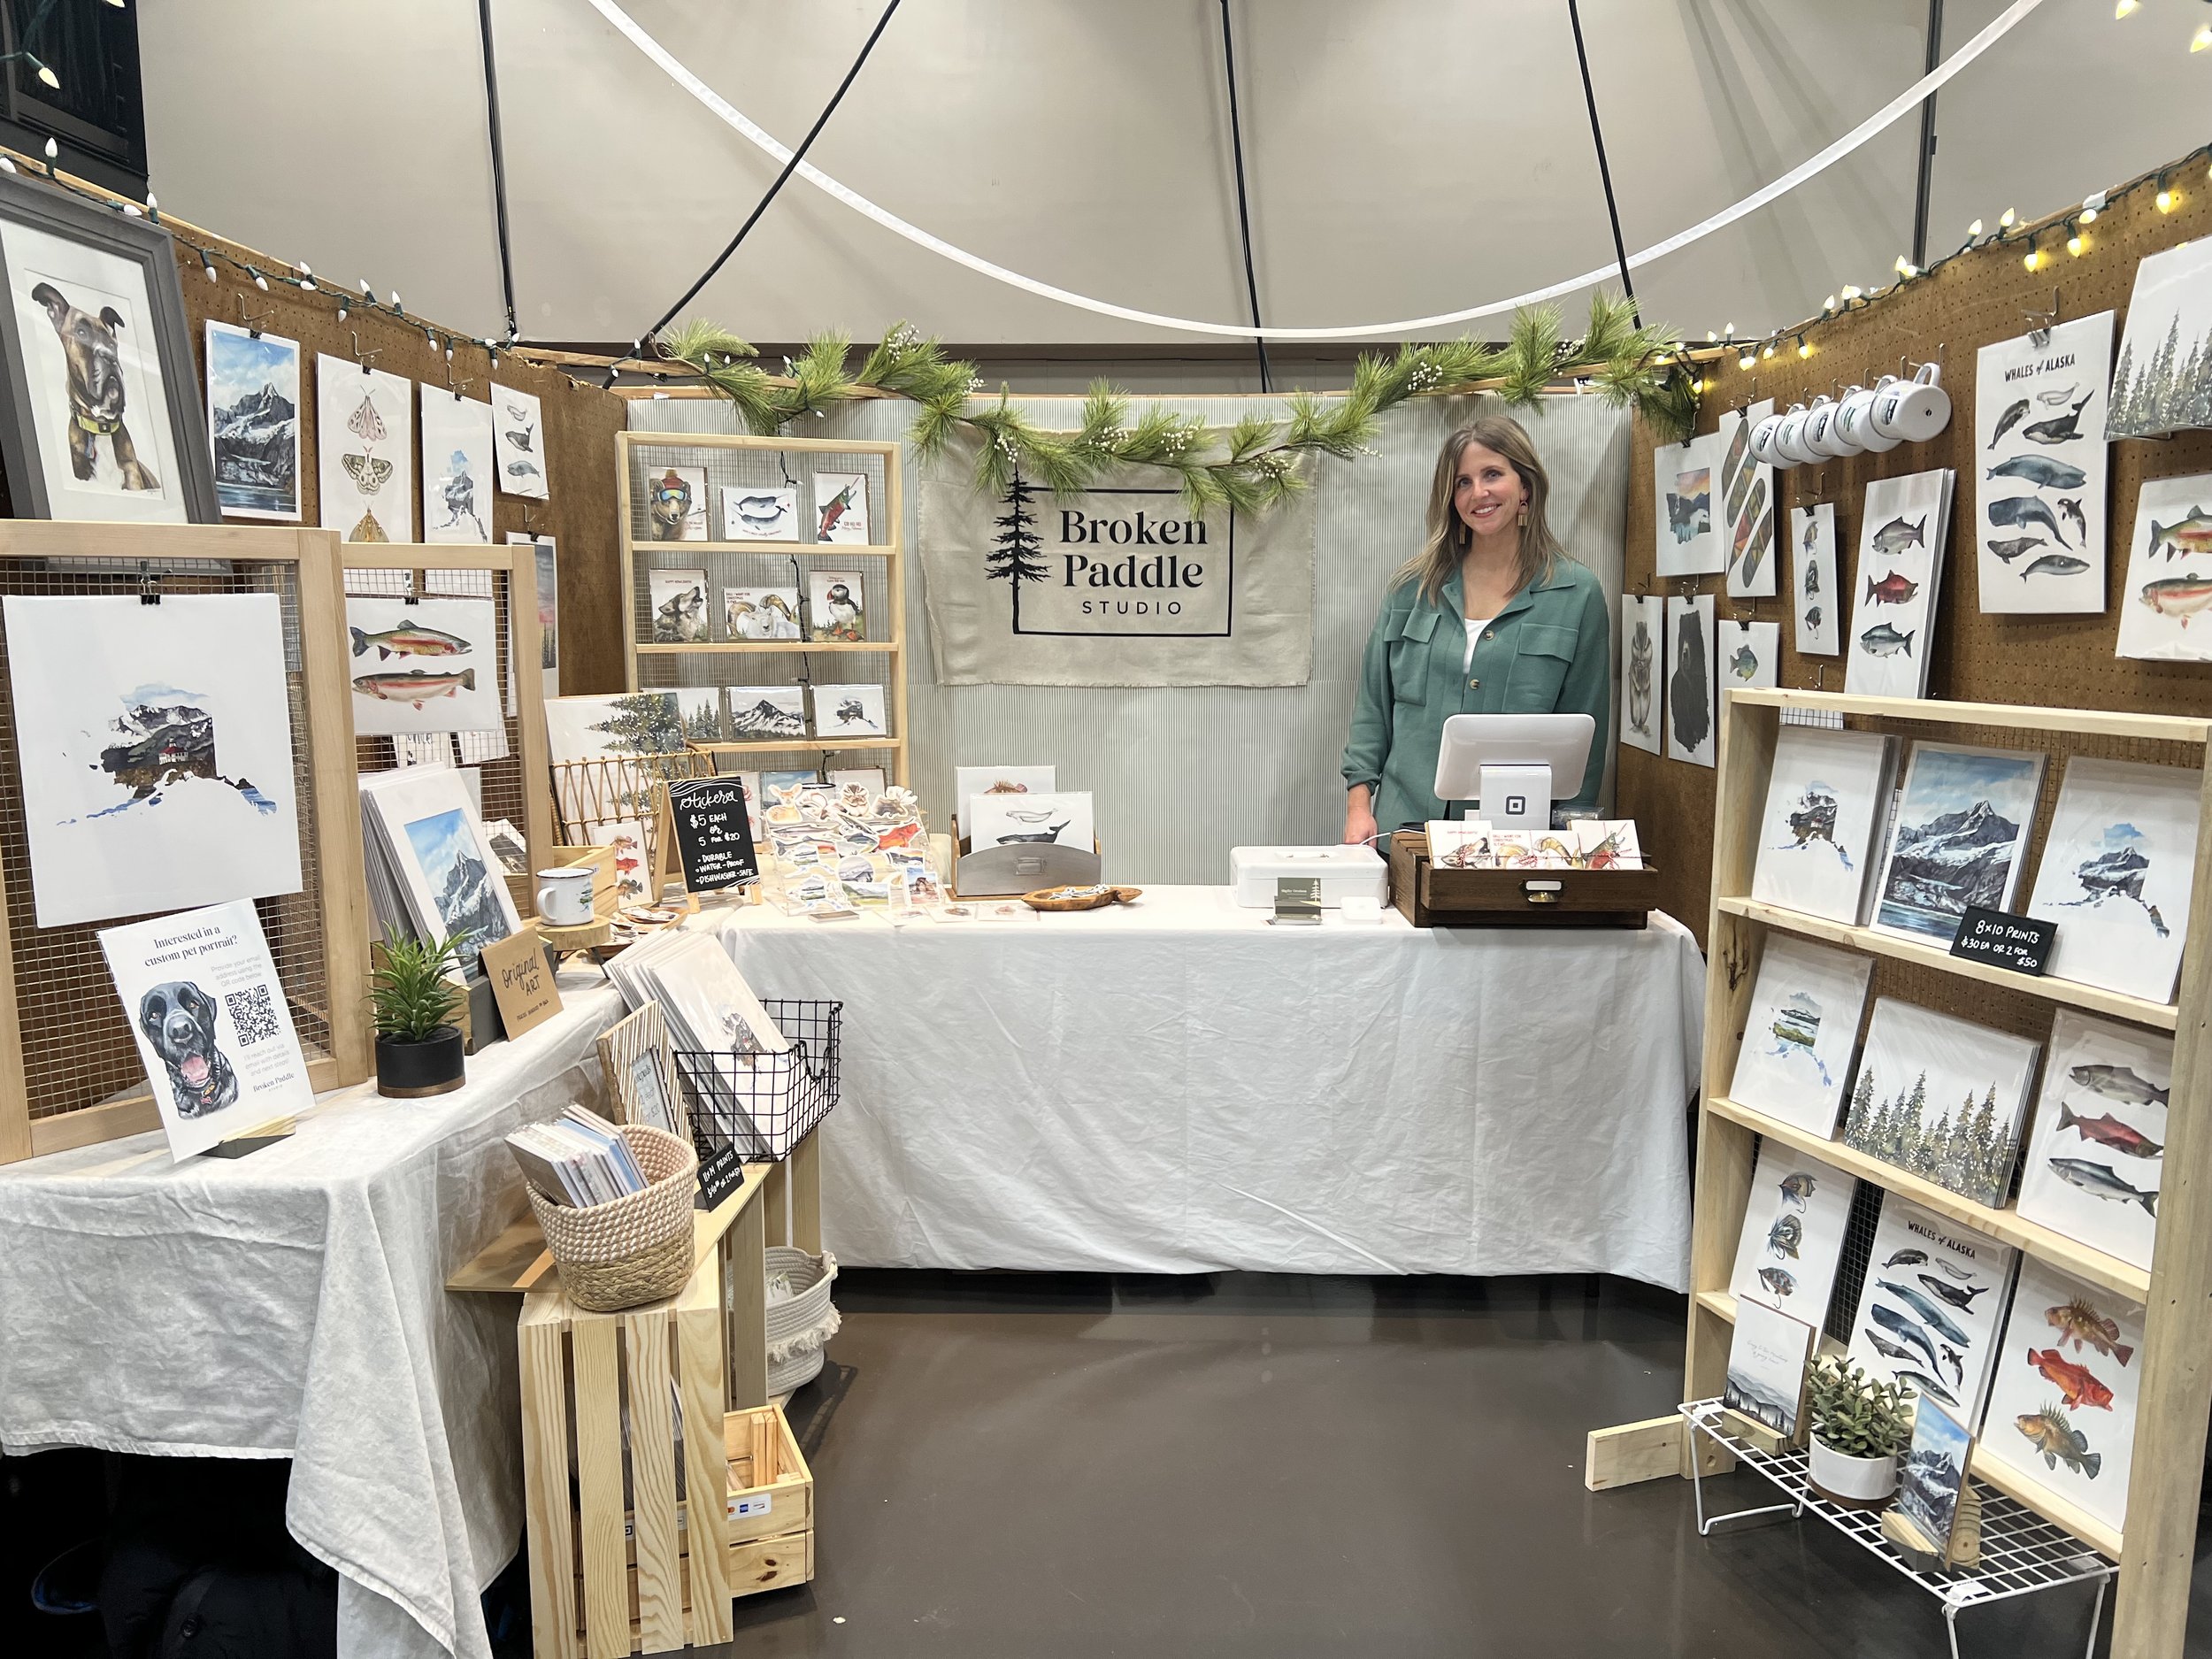
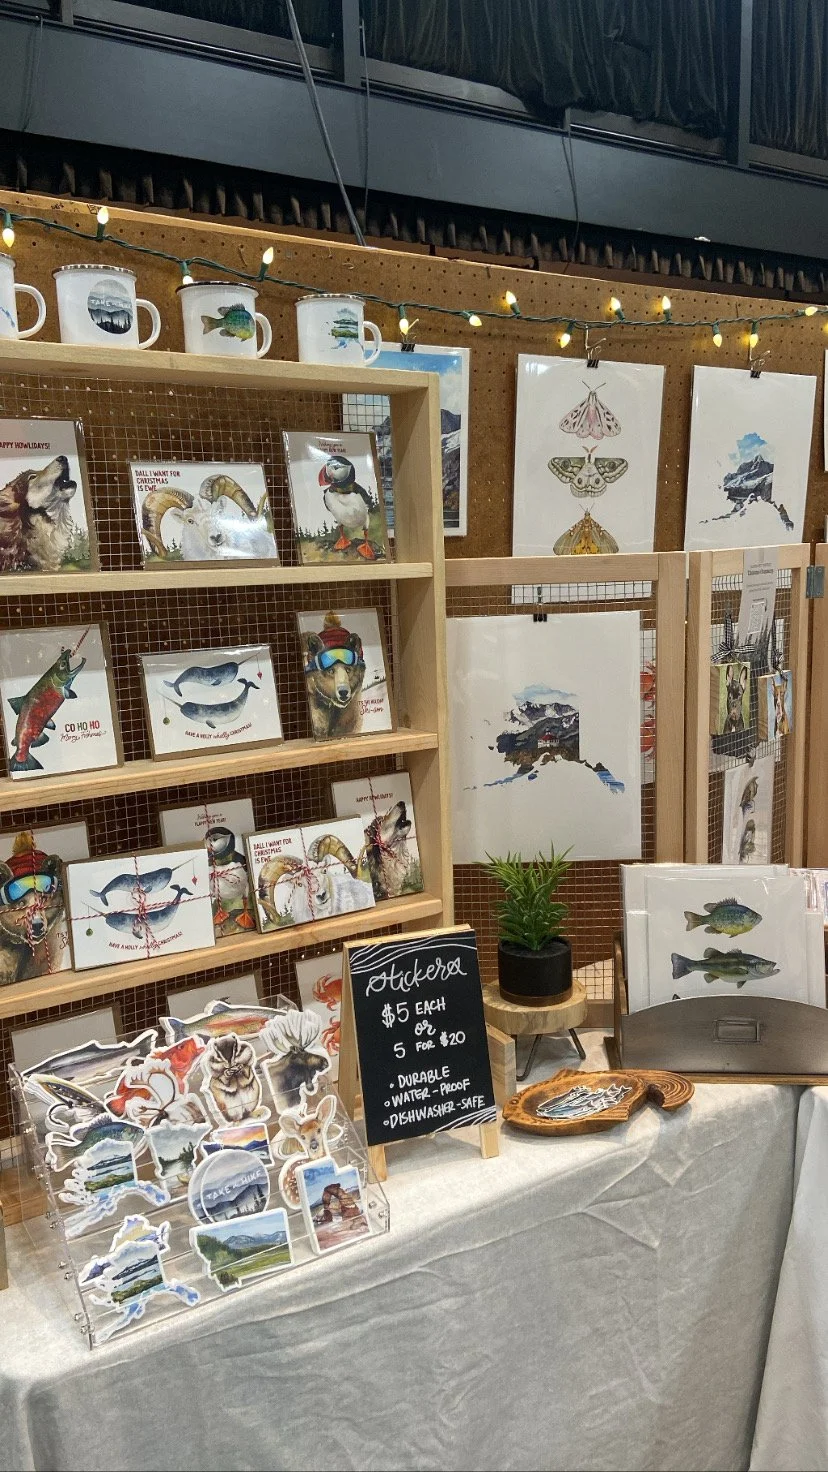
The goal of your market booth is to catch a customer’s eye and bring them closer to your art. Nothing is more boring than a bunch of products sitting flat on a table. It looks stale and uninteresting. Personally, I avoid this by leveraging height. Using a variety of homemade shelves (courtesy of my talented husband), stands, and crates, I add eye-level dimension to my table displays, taking my customers on a visual journey that inspires them to make a purchase and/or engage with my work.
If you don’t have the ability to make your own shelves or stands, look around your house! I bet you can rummage a few things together that’ll help you achieve this result. Think collapsible stands from your kitchen cupboards, decorative boxes or baskets, or literally a cardboard box with a nice piece of fabric draped over the top. Anything to lift your products up and create visual dimension.
TIP #2 — Put a price on every single product.
Speaking from experience, customers will not read your pricing menus. They just won’t. No matter how many you make or how obnoxiously big they are, people will still ask how much your stuff costs. Make it obvious and easy, because people are a lot less likely to purchase from you if they have to ask you how much something costs. I create price menus using little chalkboard signs, which are cute and all, but, more importantly, I put price tags on everything. These little peel-off stickers work really well if you need to remove your tags after your event.
Tip #2.5: If you’re able, try to offer a variety of prices. You’ll want some low value items mixed in with your higher priced art in order to appeal to a broad range of customers. Not everyone can afford an original piece of art, but most everyone can probably afford a sticker.
TIP #3: Get off your phone and engage with your potential customers!
Sure, a lot of people will approach your booth and make it really obvious that they’re not interested in a conversation. Maybe they’re hardcore introverts, maybe they have a headache, maybe they just don’t feel like talking that day. That’s okay! Even if the only thing you say is “hey, how are ya,” you should still appear friendly and available to answer questions. If someone sees you sitting in the corner staring at your phone, they’re probably gonna think you’re rude and won’t want to support your business.
I prefer to stand (tip #3.5: wear comfortable shoes!) and keep myself busy throughout the day. If I’m not engaging with a customer, I’m restocking products, cleaning up my display, or rearranging things for a better shopping experience. There will be slow periods in the day. Use those times to take a seat and rest (and maybe snap some pics or videos for social media).
TIP #4: Create a seamless checkout experience.
Most people don’t carry cash these days. So do yourself a favor and invest in some dependable payment processing tools and point-of-sale software. I adore my stand and contactless card reader from Square. It’s super simple to use and makes the entire customer checkout experience professional and fast. There’s a small processing fee (2.6% + 10 cents) attached to each sale, but the ease of use and time saved is more than worth it to me (and also something you can’t really avoid when accepting credit cards). I’ll be honest, I’m not familiar with other sales software or tools, so I can only recommend Square’s products and services. If you’ve had luck with others, please tell me! I’m always interested in learning about alternative options.
And don’t forget to advertise that you accept credit cards! If people think you only take cash, they might walk away because they mistakenly think they can’t buy from you. Make it obvious that you accept credit cards with a few “credit cards accepted!” signs posted throughout your display.
TIP #5: Be flexible. Be flexible. Be flexible.
Things are bound to go wrong. I recently sold at an outdoor Christmas market in Indiana and, despite the temperature being surprisingly mild for the season, the wind was absolutely my enemy that day. It was brutal. My art prints whipped off my shelves every five seconds, my stickers didn’t stand a chance in their little plastic shelf, and I ended up storing a few of my wooden displays below my table for fear of them knocking over my entire setup. I can handle rain. I can handle snow. I can handle heat. But wind? Ugghhhhhh. It’s the absolute worst, and it always seems to show up with wrath on important events like my wedding day and my outdoor markets. I’ll save “wind on my wedding day” for another blog post.
The important part of this story is that I was flexible in the moment. With silent curse words held under my tongue, I began taping my art prints to the base of my shelves. I rearranged a few of my larger displays to face against the wind. I removed some things that weren’t working. I put all of my cards in sturdy boxes cuz they just weren’t going to survive on their own. And this was all happening while customers scooted around my mess to shop the stuff that hadn’t lost their battle to the wind. But I made it work, and people were really gracious about the whole thing.
All this to say, when things start going wrong, take a breath, pivot, and start anew. Whether it’s the wind, a broken table leg, a tent malfunction, your booth location is cramped and smaller than anticipated, or literally anything in between, the more relaxed and flexible you can stay, the better.
Honestly, I could probably think of 100 more tips, because there’s so much that goes into markets. They’re a lot of work and, more often than not, you leave the event feeling exhausted and oh-so sore. But with the right strategies and mindset in place, you just might find that they’re your favorite way to sell your art too. Wishing you loads of success this art market season! Please don’t hesitate to reach out to me on Instagram with more questions. Always happy to help a fellow maker :)
Cheers,
Shelby


